Read the post in:
 English
綿濃濃郁,充滿南瓜的甜味,這個美味全素巧克力南瓜乳酪蛋糕是可以讓你和朋友們驚艷的秋季甜點。
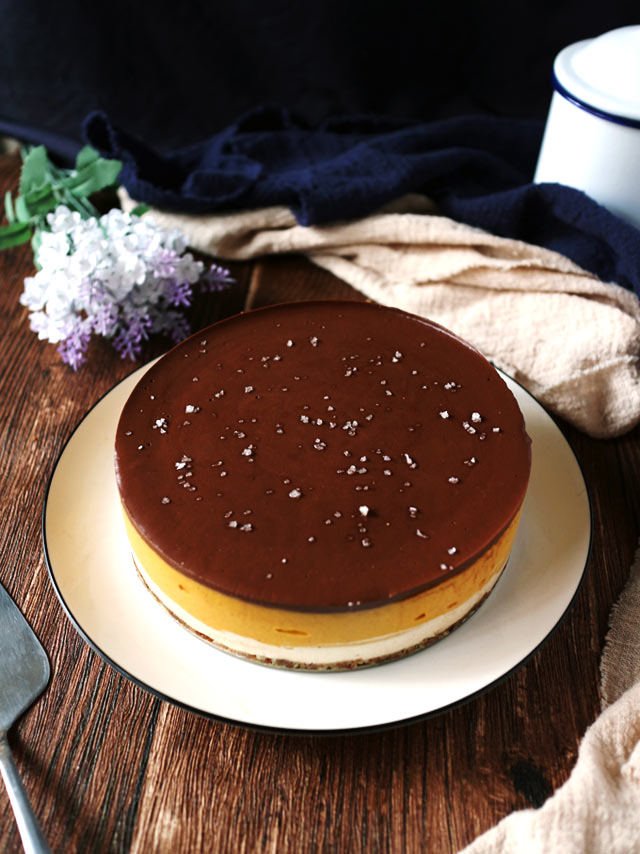
全素巧克力南瓜乳酪蛋糕
Vegan Chocolate Pumpkin Cheesecake
前陣子突然好想吃一堆南瓜口味的甜點,除了常見的南瓜派,另一個我一直很想試的就是南瓜乳酪蛋糕,因為這一年接觸純素飲食,也就想做純素的版本,而且還想做多點層次,但這次要分享的就是有四個層次的 純素巧克力南瓜乳酪蛋糕。
這個巧克力南瓜乳酪蛋糕是純素的,某種程度上應該是「偽」乳酪,因為 裡頭沒有乳酪,而是用植物性食材取代。此外這個蛋糕也不需要烘烤,就是要靠冰箱與時間讓它凝固。
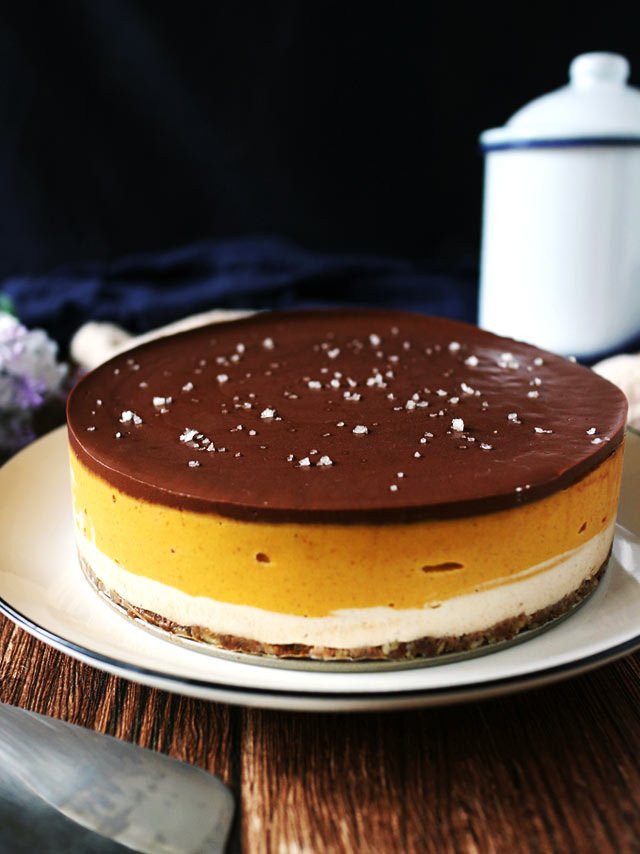
純素, 無蛋, 無牛奶, 無麵粉, 免烤
Vegan, Egg-Free, Dairy-Free, Gluten-Free, & No-Bake
這次是參考 Paleo Running Momma 的食譜,黑巧克力層次再加上橙橘的南瓜色非常亮眼。 一開始看到巧克力與南瓜這樣的組合就讓我覺得會很搭,事實上,南瓜與巧克力的組合是我一直想嚐試的。
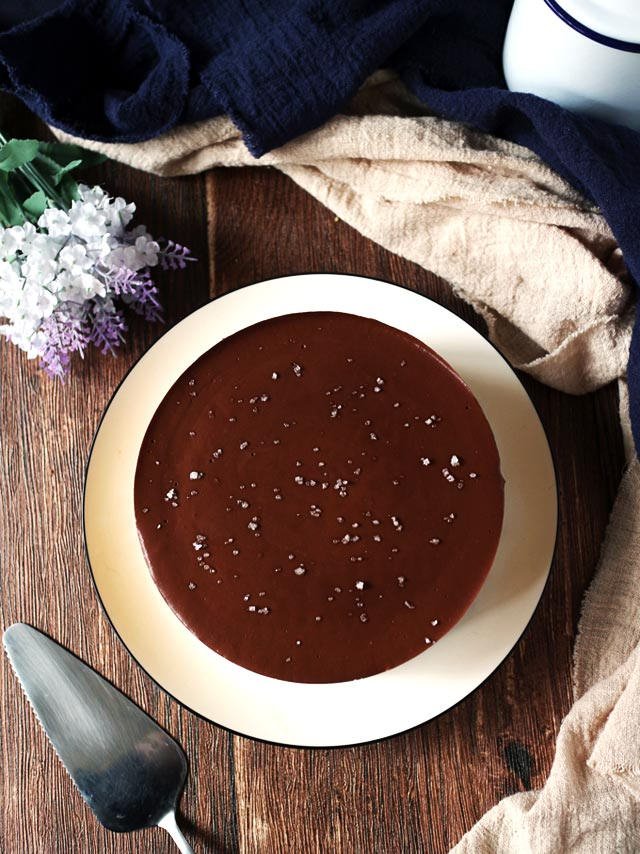
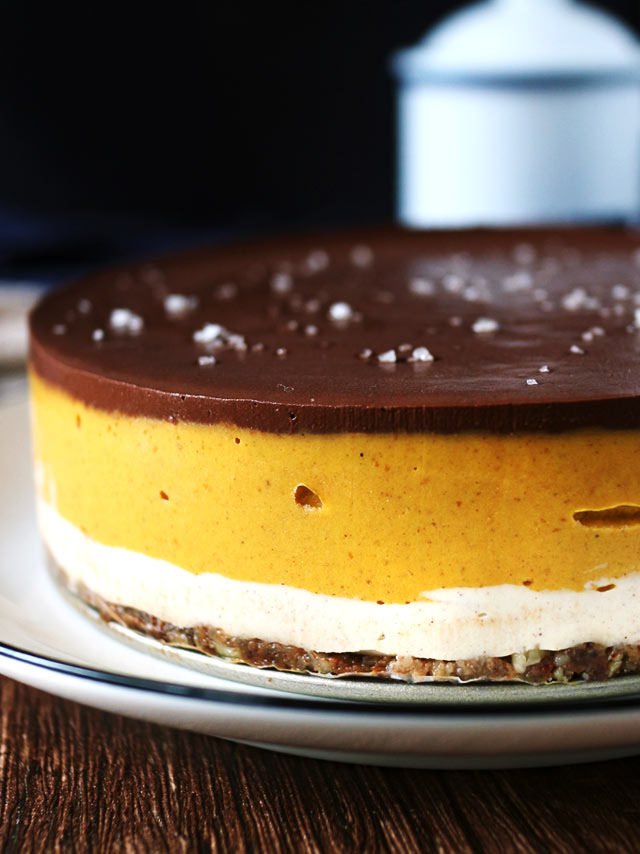
Paleo Running Momma 的食譜兩個層次主要都是由同個基底混合而成,但我想把口感、味道上的層次變化做得大一些,所以就大膽得嚐試調整食材比例、步驟,同時再加入其它食材。
其中加入的一樣食材就是柳橙汁,因為在我心中的”乳酪蛋糕”就是該要有點微酸,而柳橙的果酸甜讓我覺得應該會與南瓜的味道結合出很特別的滋味,所以就給它加下去,製作出來的味道真的讓我覺得是從所未有! 這樣的變化,也讓這乳酪蛋糕的口感與味道層次都變得更豐富。
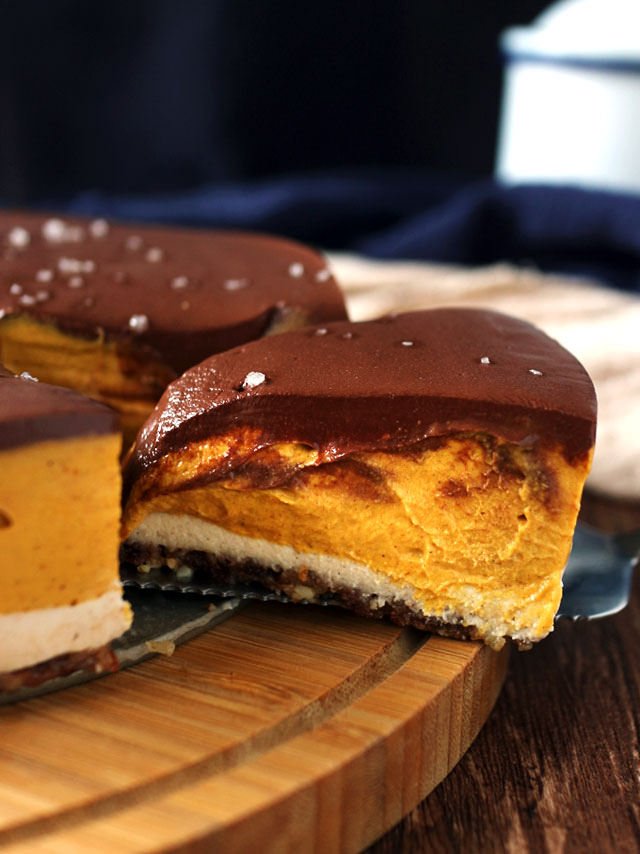
因為太期待品嚐它的味道,所以我沒有冰很久就等不及拿出來切,結果發現.中間還沒有完全凝固,不過對我來說沒差,因為最終還是味道重要。:9
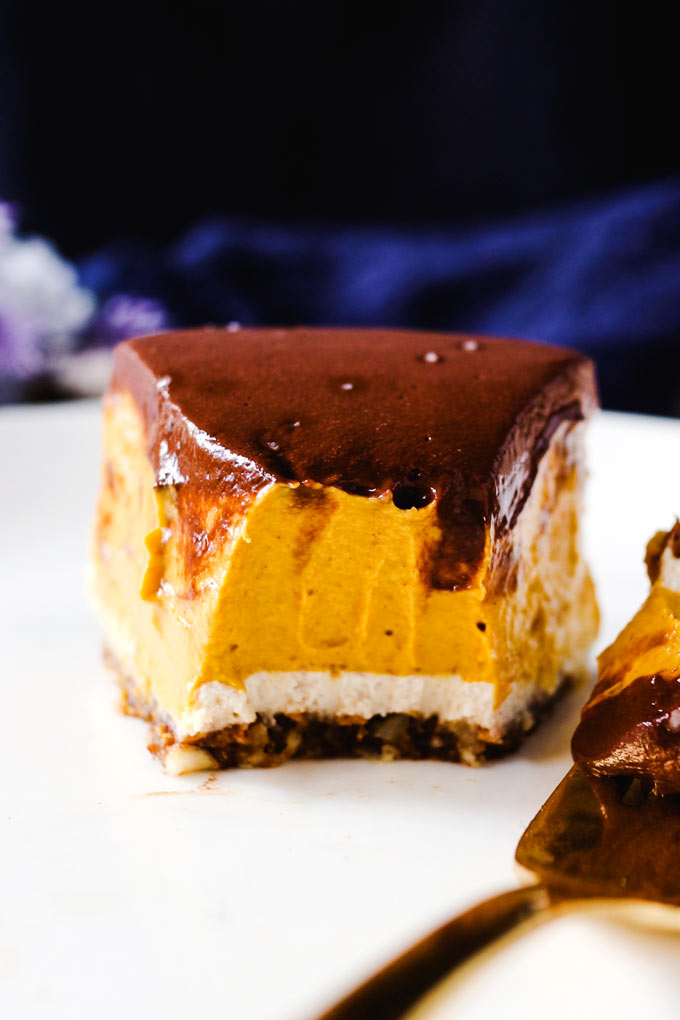
這個全素巧克力南瓜起司蛋糕共有 4 層:堅果底層、原味腰果乳酪層,南瓜起司蛋糕層,最表層是化口綿潤的巧克力醬層。
南瓜起司蛋糕層結合了南瓜泥、柳橙汁、及自製的 南瓜派香料粉等食材,結合出充滿異國風情、濃郁而不膩的滋味。 乳酪蛋糕層滑潤的口感來自於可可脂,它營造出更化口的口感,同時可可脂也讓乳酪蛋糕層有不同的風味。
可可脂比較較難取得,所以若真的沒有,也是可以用椰子油替代,不過用可可脂的口感會是最棒的。
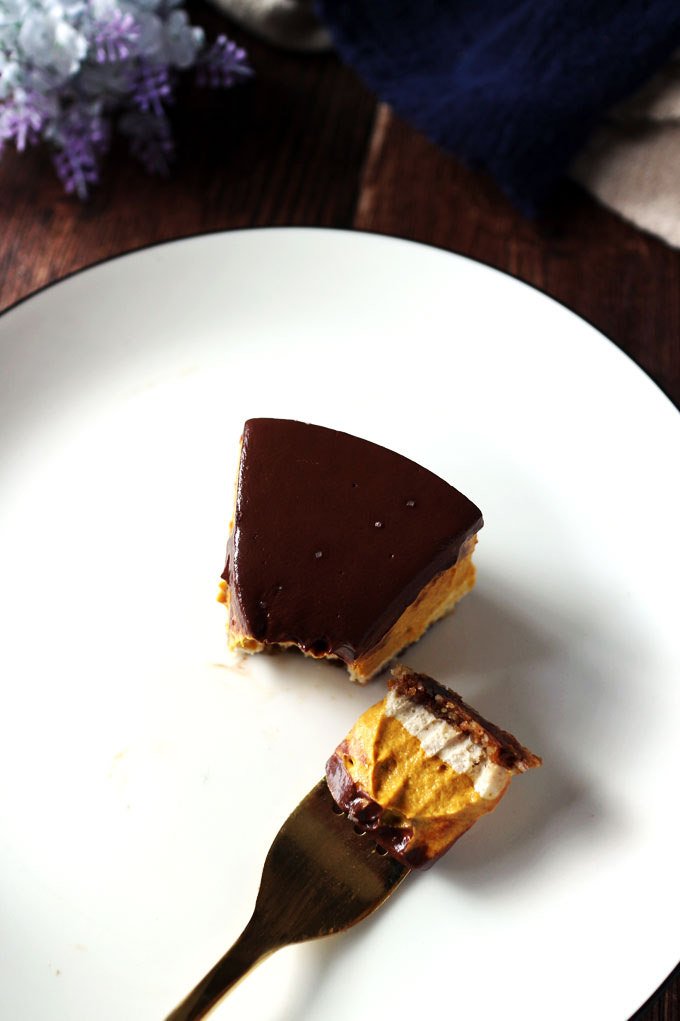
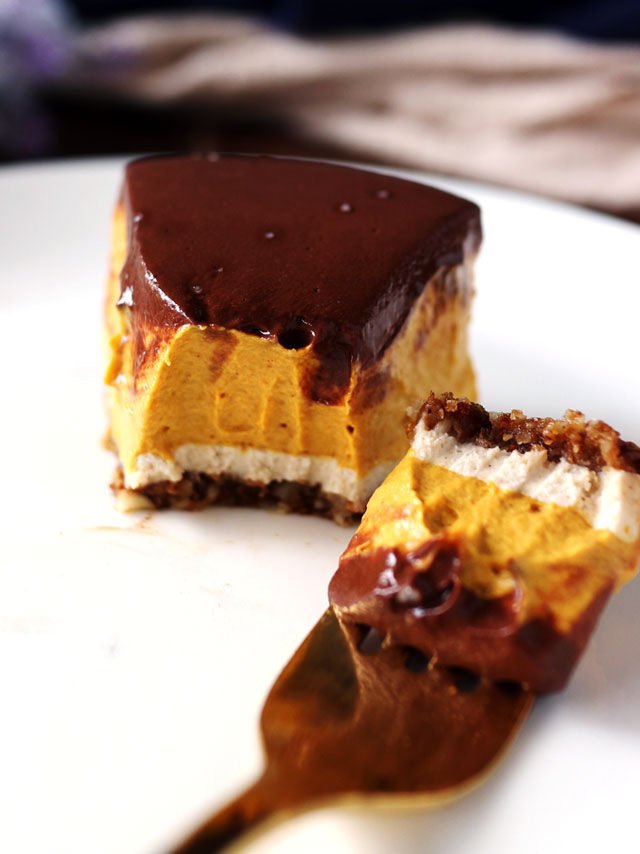
喔對了,最上層的巧克力層一定要一起吃,它的口感相較起乳酪層更綿、更化口,而且這一層只需要四樣食材! 另外最後在表面我還加了一點點鹽之花點綴,增加味道上的層次,同時也能平衡甜味。
這個巧克力南瓜腰果乳酪蛋糕的味道真的讓我自己都覺得很特別與驚豔,而且味道非常獨特,希望你也有機會試試看。
其它全素南瓜甜點食譜
全素巧克力南瓜乳酪蛋糕 Vegan Chocolate Pumpkin Cheesecake
食材
For the base
- 30 g (¼ cup) almonds 杏仁
- 30 g (¼ cup) walnuts 核桃
- 20 g (⅛ cup) pitted dates 去籽椰棗乾
- ½ tsp coffee powder 咖啡粉
- ½ tsp drinking water
- A pinch of salt 鹽
For the “cheesecake” layer
- 140 g (1 heaping cup) raw cashews 生腰果, soaked for 3-5 hours then drained 浸 泡 3-5 小時
- 2 Tbs cacao butter 可可脂, or coconut oil, melted
- 2 tsp lemon juice 檸檬汁
- 4 Tbsp maple syrup 楓糖漿
- 2 tsp vanilla extract 純香草精
- ½ tsp ground cinnamon 肉桂粉
- A pinch of salt 鹽
- 60 ml (¼ cup) unsweetened soy milk 無糖豆漿, or other non-dairy milk
Add-ins for pumpkin layer
- 165 g (¾ cup) pumpkin puree 南瓜泥
- 4 Tbsp orange juice 柳橙汁
- 2 tsp pumpkin pie spice 南瓜派香料粉, see note*
- 2 Tbsp maple syrup 楓糖漿
For the chocolate cream layer
- 4 Tbsp cacao powder 生可可粉
- 80 ml (⅓ cup) coconut cream 椰子奶油, from canned coconut milk, see note**
- 2 Tbsp maple syrup 楓糖漿
- 1/4 tsp vanilla extract 純香草精
- A pinch of fleur de sel 鹽之花, or coarse sea salt, to sprinkle on top
作法
- 取一個 6 吋蛋糕模,模具底層鋪烘焙紙
製作底層
- 將椰棗乾放入食物處理機中大略打碎,咖啡粉先與水混合後,再與其它底層食材放入處理機中,混合攪打均勻至可捏成團,視情況停下來做刮杯的動作。若發現質地過乾,可添加少許水幫助成團
- 將底層食材填入模具中,壓實壓緊,冷凍備用
製作腰果乳酪層
- 將浸泡過的腰果水倒掉,再沖洗一下
- 將腰果、融化的可可脂、楓糖漿、檸檬汁與香草精放到高速食物調理機中,攪打至滑順,再取出冷凍的模具,取適量腰果乳酪混合糊 (可以蓋住底層的量) 填入模具中、鋪蓋住底層並抹平,再放回冷凍庫冷凍 20-30 分鐘
- 將南瓜泥、柳橙汁與南瓜派香料粉加入剩餘的腰果乳酪糊中,用調理機混合攪打均勻,再鋪入模具中,蓋過原味腰果乳酪層,鋪平,再冷凍 30-60 分鐘或至南瓜乳酪層大略凝固
製作巧克力層
- 將巧克力層的所有食材放入食物處理機中攪打混合均勻,切記別過度攪打
- 將冷凍庫的蛋糕取出,將巧克力層混合物鋪平於乳酪層上頭,再用保鮮模封蓋住模具,放入冷藏至少 4 小時
- 取出,表面灑上少許鹽之花點綴,即可切塊享用
Directions:
- Line the bottom of a 6" cake pan with parchment paper.
To make the base:
- Roughly chop the pitted dates in a food processor. Mix the coffee powder and the water first, then add it along with other ingredients for the base to the food processor, and continue to process until the mixture can stick together when pressing between your fingers. Stop and scrape down the sides if needed. If you find the texture is too dry, add some water to help to bind the mixture.
- Press the base mixture into the mold. Freeze while we make the cheesecake layer.
To make the Cashew cheesecake layer:
- Drain out the water from the soaked cashews, give them a rinse.
- In a blender, add the cashews, cacao butter, maple syrup (4 Tbsp), lemon juice, and vanilla extract. Blend until smooth.
- Take out the pan from the freezer, pour some cashew cheesecake mixture (enough to cover the base) into the pan and smooth it out. Return to the freezer to freeze for 20-30 minutes until set.
- To the leftover cashew cheesecake mixture in the blender, add the pumpkin purée, orange juice, pumpkin pie spice, and another 2 Tbs maple syrup. Blend until smooth.
- Remove the pan from the freezer and pour the pumpkin cheesecake mixture onto the cashew cheesecake layer. Smooth the top then return to the freezer for another 30-60 minutes or until the pumpkin cheesecake mixture is almost set.
To make the Chocolate cream layer
- Mix all ingredients in a food processor until all combine. Do not over-mix.
- Take out the pan in the freezer. Pour the chocolate cream mixture onto the top. Cover and refrigerate for at least 4 hours.
- Remove from the pan. Sprinkle some fleur de sel. Slice and Devour!
Video
備註
- *南瓜派香料粉:可用市售的,也可自製:南瓜派香料粉食譜
- **椰奶奶油:將椰漿罐頭冷藏一晚,要使用前開罐,取濃稠的部份使用,剩餘的可用在果昔或其它食譜
- 剩下的蛋糕密封冷藏保存,約可放 4 – 6 天,冷凍一個月,要吃前再拿到冷藏或室溫解凍
- *Pumpkin pie spice: You can use store-bought or your own RECIPE HERE
- **Coconut cream: Refrigerate one canned coconut milk overnight. When about to use, open the can and scoop out the thick/ hard part for use. Save the leftover part for smoothies or other recipes.
- Store the leftover cake in the fridge for 4 – 6 days or 1 month in the freezer. Defrost them in the fridge or at room temperature before serving.
Adapted from Paleo Running Momma.
