If you crave the coffee flavor and chocolate at the same time, this Chocolate Coffee Cheesecake is here for you! It’s vegan, no-bake, and super creamy and delicious!
巧克力控的巧克力癮似乎愈接近冬天愈開,最近又開始很想吃濃郁的巧克力甜點,然後想到好像一陣子沒做全素起司蛋糕了,然後也特別想吃巧克力與咖啡結合的滋味,於是就做了這個 全素巧克力咖啡起司蛋糕!
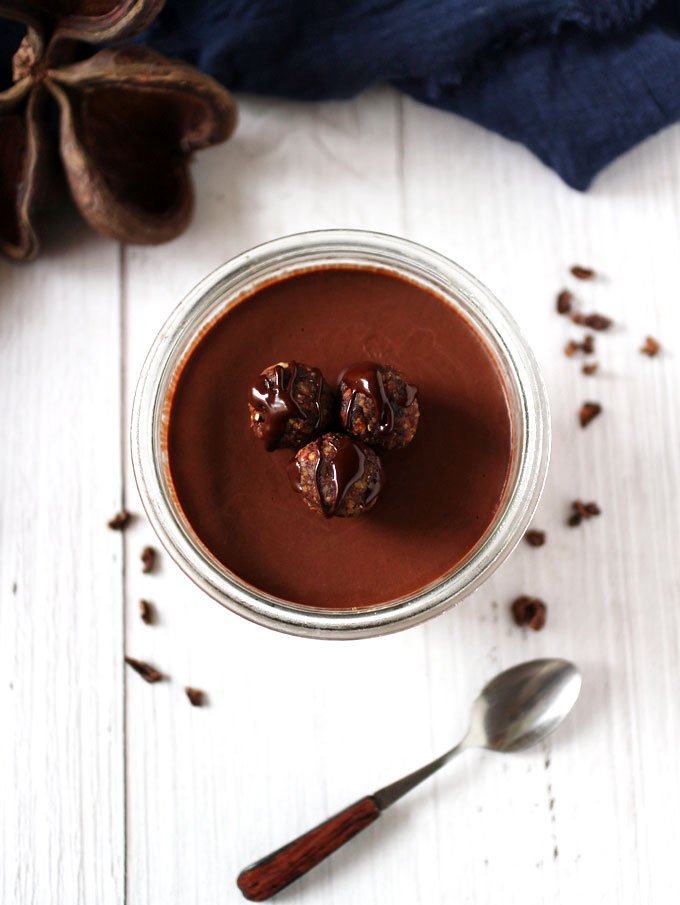
全素巧克力咖啡起司蛋糕 (免烤)
Vegan No-Bake Chocolate Coffee Cheesecake
不知道為什麼有時候想叫它「起司蛋糕」,有時候想叫它「乳酪蛋糕」,Anyway, 你應該明白我在說什麼,一如往常,這全素的起司蛋糕無蛋、無牛奶、無動物性製品,一樣是免烤、無麵粉的,更特別的是,這個全素巧克力咖啡起司蛋糕還是無糖的! 但別擔心它會很苦,只是沒有額外添加糖,還是有食材本身的自然甜味,讓它有適當的甜味、口感濃郁美味!
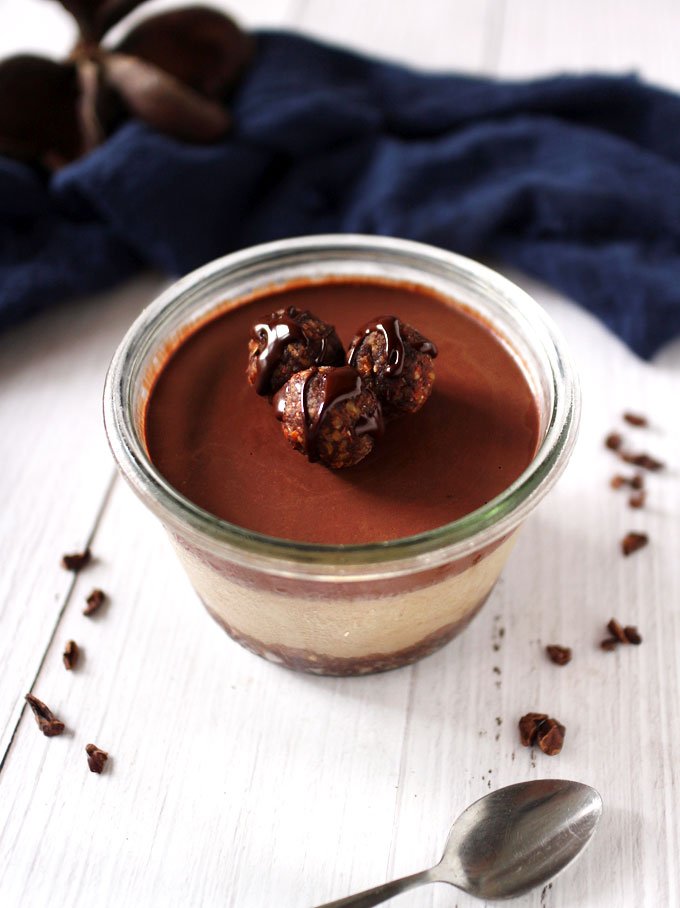
不同於先前常用蛋糕模來製作,這次是特別想把它做成「杯」的樣貌,所以就拿了常用的玻璃密封罐來盛裝,省去脫模的步驟,而且也方便保存,直接蓋上蓋子就好!
因為我是自己一個人享用,就直接用挖的方式吃 (我總覺得挖東西來吃會特別感到滿足呢!),但如果你是要與它人分享的,建議還是用 4 吋的蛋糕模製作,或是放入 4 個小的分食享用杯。
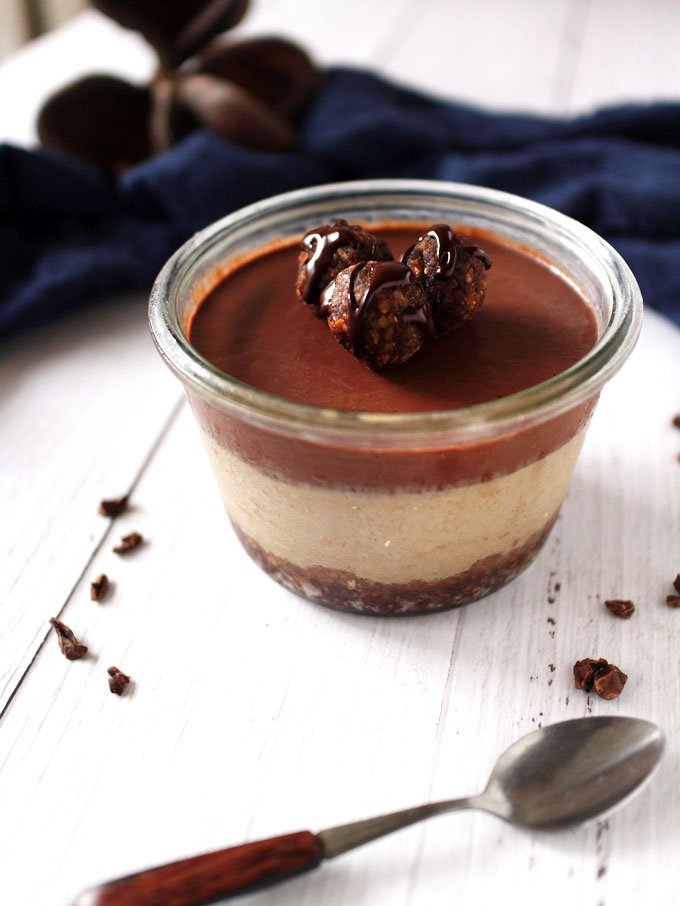
堅果可可底層 + 咖啡起司蛋糕層 + 巧克力慕斯層
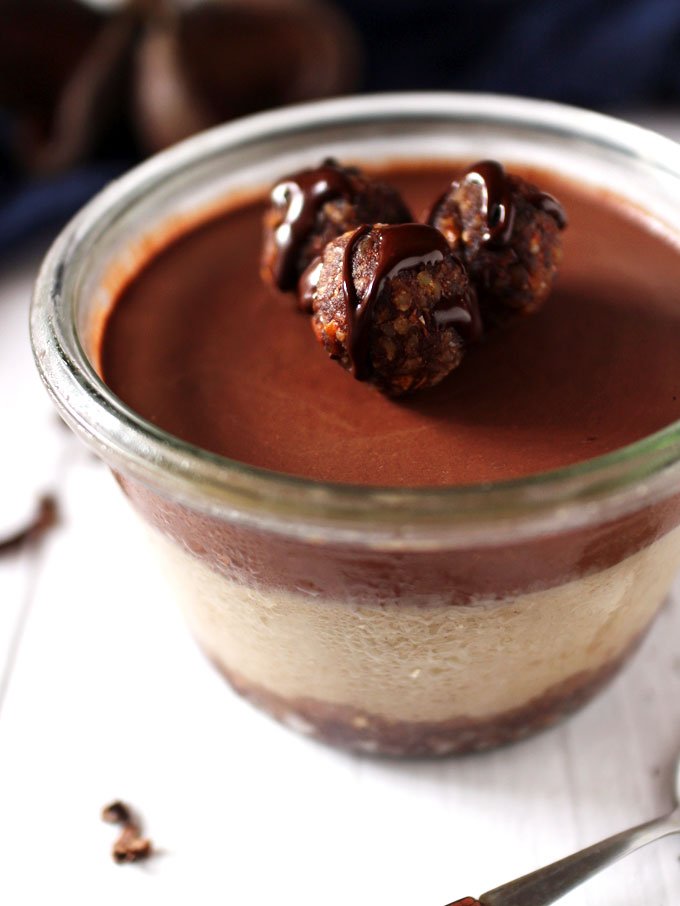
這個全素巧克力咖啡起司蛋糕主要分成三層,分別是由堅果、可可碎豆組成的底層、帶著咖啡香似提拉米蘇的咖啡起司蛋糕層,再加上濃郁的巧克力慕斯層,光聽到這樣的組合,你是否和我一樣,已經想直接挖一口來吃了呢? (我忍,因為要拍照//笑)

另外這次特別在上頭放了三小顆可可能量球點綴,它是和底層一樣的,但一點點的小改變,就能讓它變得不太一樣,而且優點是,底層永遠不怕多,因為可以把它們改做成能量球享用,一石二鳥! (希望我成語沒用錯)
喔對了,此外這次我使用的堅果、種籽,應該是說所有食材,都是未經烘烤、加熱的,所以算是裸食 (Raw),因為其實堅果、種籽其實都要浸泡會比較好消化,尤其是堅果,因為堅果類含有高量植酸 (Phytic Acid) 與酵素抑制劑 (Enzyme Inhibitor),經長時間浸泡能去除這些物質,讓人體更好吸收,之後我會再寫一篇仔細說明,有興趣的朋友可先閱讀 此篇 (英文) 或找 Google 大師!
底層的堅果與種籽我是先浸泡,之後再用烘乾機烘乾,當然如果你不想這麼麻煩,直接用生的,或是烤過的都可以。
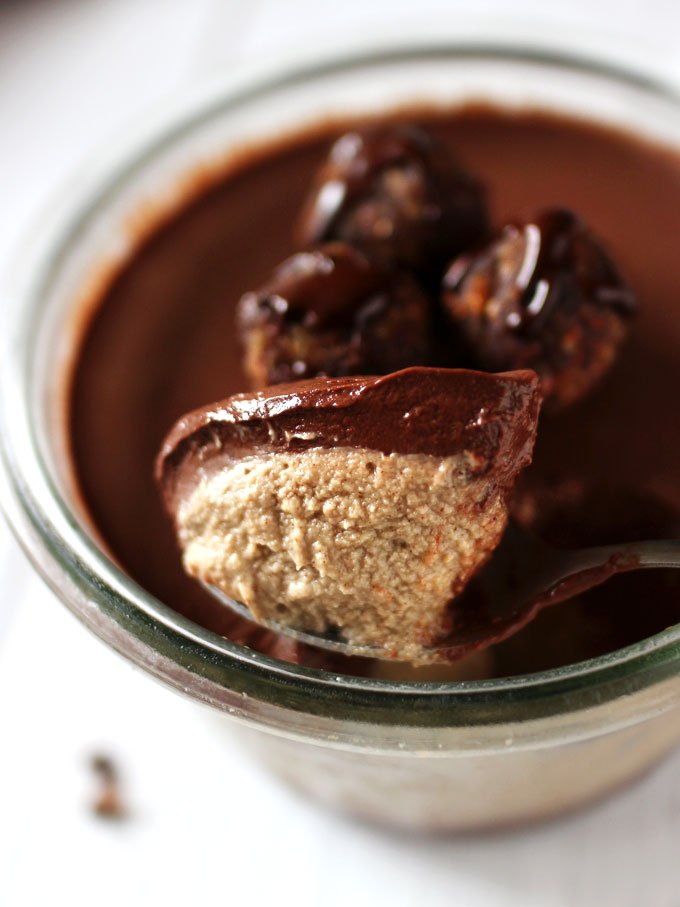
最近莫名的特別想吃咖啡口味的甜點,我想應該是我想念 提拉米蘇 了,但又想要吃點不一樣的滋味,而這個全素巧克力咖啡起司蛋糕就和提拉米蘇的味道不太一樣,上層的巧克力層是濃郁滑潤、比較像慕斯的口感,而中間的咖啡起司蛋糕則更緊實、綿潤,兩層都很濃郁。
某種程度上來說,它算是很”decadent”、營養熱量密度高的甜點,但裡頭的材料相較起一般常見的糕點,你明白都是對你身體更好的! 也因為很濃郁,所以別小看這一杯,因為真的很濃郁,所以你一次應該是不會吃很多,像我已經是個非常愛濃郁甜點的人了,但它都讓我分了 4 次才吃完,所以這個份量我也就抓大約 4 人份。
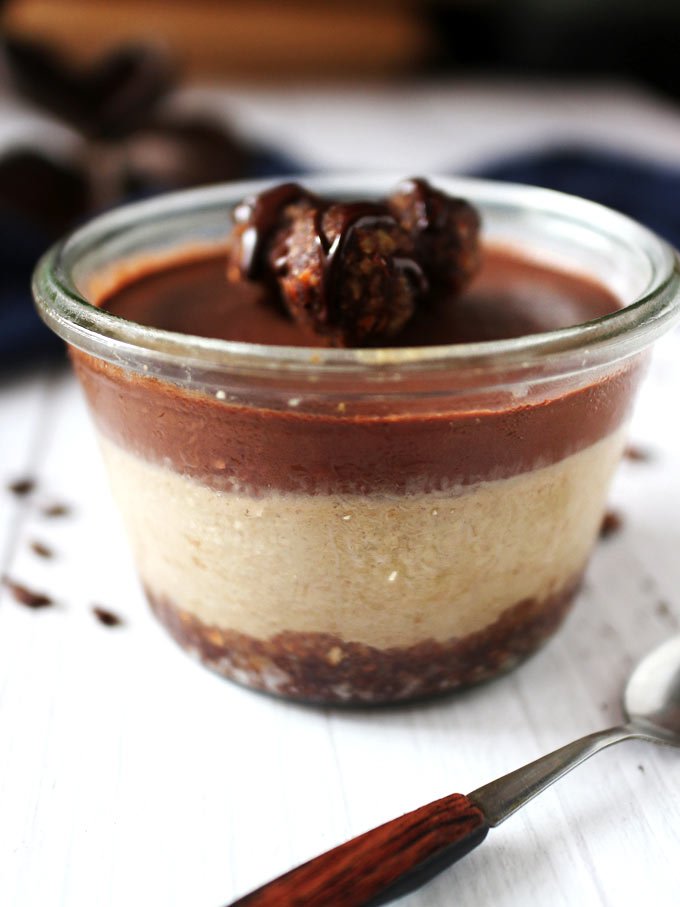
如果你愛提拉米蘇蛋糕 (我有分享過的全素提拉米蘇蛋糕食譜在這裡),那我想這個甜點也會讓你非常滿足的!
來動手做吧!
Let’s do this!
其它免烤蛋糕食譜:

全素巧克力咖啡起司蛋糕 (免烤) No-Bake Vegan Chocolate Coffee Cheesecake
食材
For the base 底層
- 40 g almonds 杏仁, a heaping 1/4 cup
- 20 g pitted dates 去籽椰棗乾
- 1/2 Tbsp
cacao nibs 可可碎豆 - ~1/2 Tbsp water 水, depending on the texture 視情況添加
For the coffee layer 咖啡起司層
- 50 g raw cashews, soaked 生腰果, 1/2 cup, 浸泡於飲用水中 3-4 小時
- 60 ml full-fat coconut milk 全脂椰奶, 1/4 cup
- 15 g pitted dates 去籽椰棗乾
- 1/2 Tbsp strong coffee 濃咖啡
- 1/2 Tbsp
coconut oil 椰子油 , melted 融化 - A pinch salt 1 小撮鹽
For the chocolate layer 巧克力慕斯層
- 3 Tbsp 生可可粉
- 15 g pitted dates 去籽椰棗乾
- 120 ml full-fat coconut milk 全脂椰奶, 1/2 cup
- 1 Tbsp almond milk 杏仁奶, see note for homemade recipe
- A pinch salt 1 小撮鹽
作法
製作底層
- 將底層混合物取出 3 大茶匙的量,滾成圓球,剩下的填壓入罐子/模具底層,分別放入冷凍庫備用
製作咖啡起司層
- 將浸泡過的腰果濾掉水,用飲用水再稍微清洗一下
- 將腰果與咖啡起司層的其它食材放入食物調理機中,攪打混合均勻至滑順。若椰子油呈凝固狀態,先融化
- 取出置於冷凍的底層,將咖啡起司混合物倒入罐子或模具內,輕輕搖晃使混合物平鋪於底層上,再放回冷凍至少 30 分鐘,至起司層表面凝固,讓它留在冷凍備用
製作巧克力慕斯層
- 取出冷凍的咖啡起司蛋糕,確認起司層表面已凝固,將巧克力慕斯層混合物倒於上方,鋪平,輕輕搖晃使其均勻分佈
- 將其放回冷凍庫 30 分鐘,或加蓋放到冷藏 2-3 小時,至巧克力層凝固
- 將事先取底層滾成的可可圓球置於上方點綴 (非必要,我有再融一點巧克力淋上點綴) 即可享用
English Version
To make the base
- Add the pitted dates to a food processor and chop them first, then add the almonds and cacao nibs, continue to process until all are finely chopped. The mixture should be stick together when pressed between your fingers. If it's too dry, add a small dash of water, and process again to help to bind.
- Scoop about 3 big teaspoons of the mixture to make 3 little balls. Press the rest mixture to the bottom of the jar/pan. Place both the balls and the jar separately in the freezer while we make the filling.
To make the coffee cheesecake layer:
- Drain out the water from the soaking cashews and give it a rinse.
- Add the cashews and the rest of the ingredients for the coffee layer in a blender and blend until smooth and creamy. If the coconut oil is in solid state, melt it first.
- Take out the jar from the freezer. Pour the coffee cheesecake mixture onto the base layer. Gently wiggle the jar to let the mixture even out. Return it to the freezer for at least 30 minutes or until the surface of the cheesecake layer is set. Leave it in the freezer while we make the chocolate layer.
To make the chocolate mousse layer
- Blend all ingredients until smooth. (I use cacao powder. You can use cocoa powder if that works for you but the flavor will be slightly different.)
- Remove the jar from the freezer. Pour the chocolate mixture onto the cheesecake layer, and smooth it out.
- Return the jar to the freezer for 30 minutes or 2 - 3 hours with the lid on until it's completely set.
- Take out the small balls that we made from the base mixture and place them on the cake. (This is optional step but I just want to make it look a little different. 😛 I also drizzle some melted dark chocolate on the balls.) Scoop or slice if you making them in a pan. Then...DIVE IN!
備註
- Homemade Almond Milk
- 自製杏仁奶食譜
- 保存:剩下的密封冷藏保存,約可放 3 - 5 天
- Storage: Store the leftover in the fridge for 3 - 5 days.
- Adapted from The Loopy Whisk
© barrelleaf.com 網站內所有內容與圖片均受版權保護。未經允許請勿使用。
