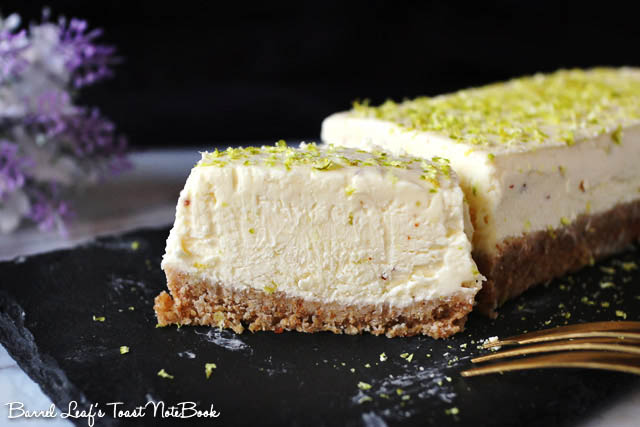
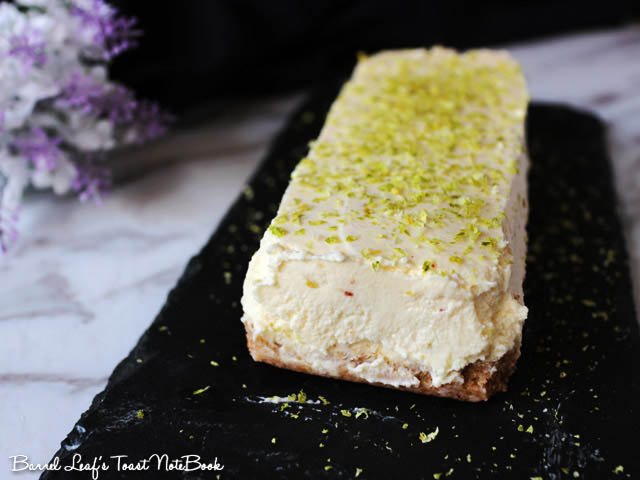
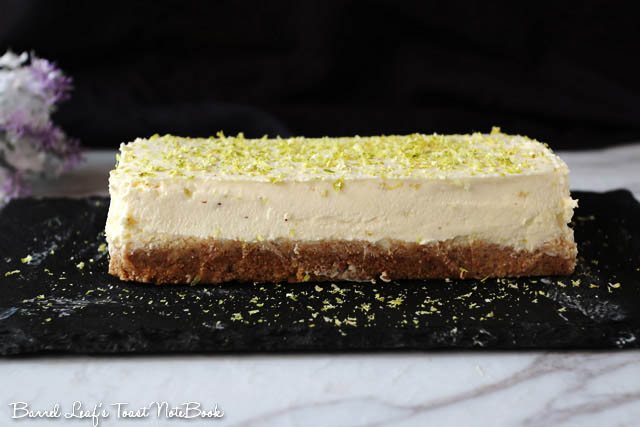
前陣子熊熊又很想吃乳酪蛋糕,外面售價不便宜,而且也不確定添加了多少糖 (大部份市售乳酪蛋糕對我來說都偏甜),所以又想自己做,但又不想買一大塊奶油乳酪 (先前買總要想辦法努力消耗掉)。前陣子去逛賣場時剛好看到有「減脂奶油乳酪抹醬」有兩件優惠價就買了!也用它做了這個 減脂檸檬乳酪蛋糕。

減脂檸檬乳酪蛋糕 (無精緻糖)
Skinny Lime Cheesecake (Refined-Sugar-Free)
我這次製作的這個檸檬乳酪蛋糕是利用減脂奶油乳酪搭配豆漿優格製作,雞蛋的部份僅使用蛋白,相較起一般使用全脂奶油乳酪、酸奶與蛋黃製作的乳酪蛋糕,脂肪含量有著實拉低。
另外這個乳酪蛋糕體也沒有使用麵粉與精緻糖,讓整體吃起來可以沒有太大的負擔感。
加入新鮮檸檬汁與檸檬皮,讓這減脂的乳酪蛋糕更增加風味與香氣。
這次使用的是酸味較明顯的綠檸檬,也是可以用黃檸檬,但香氣與滋味會稍有不同。
雖然說它是減脂的,但還是算重乳酪蛋糕,口感質地還是非常濃郁的。
減脂奶油乳酪質地還是很綿密,直接吃和全脂奶油乳酪滋味上有些差異 (全脂奶油乳酪會比較香),但這個減脂乳酪蛋糕成品讓我覺得滋味與先前製作類似的蜂蜜檸檬生乳酪蛋糕差距不遠,口感一樣濃郁,但吃起來檸檬香氣與滋味更明顯,非常清新但又有吃甜點的滿足感。
來動手做吧!
Let’s do this!
(※ 引用食譜煩請註明出處與原文網址.勿拿此食譜行商業行為 ※)
減脂檸檬乳酪蛋糕
Skinny Lime Cheesecake
參考改自 Adapted from: Live Well Bake Often
料理烘焙食譜 度量單位標準 Recipe Measurement+ Q&A
- 特別器具 Special equipment:
- 一個長條蛋糕模 (我使用的模具內徑 15.5 × 6.5 cm)
- A pound cake pan (Mine is 15.5 × 6.5 cm )
食材 :(約 6 人份)
- Ingredients:(Serves: 6)
- For the Base
- 45 g biscuits (I use sugar-free crakers)
- 1 – 2 Tbs coconut oil, melted if solid
- For the cheesecake
- 250 g (about 9 oz) reduced-fat cream cheese (I use spread)
- 2 Tbs soy yogurt (use dairy yogurt if you don’t have, but the fat content if higher)
- 2 Tbs palm syrup or maple syrup
- 1 Tbs fresh lime juice
- 1 egg white
- For the topping
- Fresh lime zest (grated on top)
- For the Base
- 準備工作 Preparation:
- 食材秤量好後
- 可以的話,事先將雞蛋與奶油乳酪從冰箱取出退至常溫
- 模具內鋪烘焙紙
- Measure all ingredients.
- Remove the egg and cream cheese from the fridge and wait for them to be at room temperature if possible.
- Line the baking pan
- 作法/步驟:
- 將烤箱以 170°C 預熱
- 製作底層:將餅乾用食物處理機或用敲打方式弄成粉狀,加入融化的椰子油,混合均勻後壓入模具內底部,至於一旁備用
- 製作乳酪蛋糕體:將奶油乳酪與優格用混合攪拌均勻至滑順,之後再加入其它剩餘的食材,攪拌混合均勻
- 將乳酪蛋糕糊倒入鋪餅乾底的模具中,放入烤箱,以 170°C 烘烤約 25 – 30 分鐘,至乳酪蛋糕邊大致凝固,中心還有一點點晃動
- 從烤箱取出,不脫膜置於網架上放涼,再包好,放入冰箱冷藏至少 6 小時,隔夜為佳
- 隔天從冷藏取出脫模,再刨上新鮮檸檬皮即可切塊享用
- Directions:
- Preheat the oven at 170°C
- To make the Base: Ground the biscuits in a food processor or mush them with any tool to make them powdery. Add the melted coconut oil and mix together until they become crumbly. Press the mixture into the pan. Set aside.
- To make the Cheesecake: Mix the cream cheese and yogurt together until smooth, then add the remaining ingredients and mix to combine.
- Pour the mixture into the pan over the base. Bake at 170°C for 25 – 30 minutes until the edges are set but the center is still slightly jiggly.
- Remove the pan from the oven onto a wire rack to cool down. Then wrap well and refrigerate for at least 6 hours. Make it stay in the fridge overnight if possible.
- Remove from the fridge and the pan. Grate more lime zest on top, slice, and enjoy.
-
- 註
- 剩餘的蛋糕密封冷藏保存約可放 3 天,冷凍約 1 個月
- 其它輕感乳酪蛋糕食譜:低醣輕乳酪蛋糕 (無麵粉), 微空氣感優格乳酪蛋糕 (無麵粉, 無餅乾底), 酸奶油輕乳酪蛋糕 (無粉,低醣)
- 更多無麵粉食譜:點我
- 更多烘焙食譜:點我
- 此頁面含贊助連結,透過連結購買能透過第三方間接贊助此站,提供更豐富優質食譜與內容,您的購買並不會有任何多的附加費用
- Notes
- Store the leftover cake in the fridge for 3 days or 1 month in the freezer.
- Other Light Cheesecake recipes: Low Carb Fluffy Cheesecake (GF) , Fluffy Crustless Yogurt Cheesecake (GF), Sour Cream Cheesecake (GF+ Low-Carb)
- More Gluten-Free recipes: HERE
- More baking recipes: HERE
- This page contains affiliate links, which supports me with a small commission to produce more great content on this site at no additional cost to you. Thank you for reading and supporting Barrel Leaf.
- 註
© barrelleaf.com 網站內所有內容與圖片均受版權保護。未經允許請勿使用。若您想發表使用此食譜延伸之內容,請使用自己的話重新撰寫整個食譜,並包含原食譜網址連結。
Bon appétit!
[製作日:2017.10.23]
延伸閱讀 Related Articles
🔽 新創 FB社團,歡迎大家加入 🔽
『自然飲食小廚房 Healthy Clean Kitchen』
【桶子葉の吐司記 Barrel Leaf’s Toast NoteBook】
[Facebook.IG.YouTube.Profile.Website]
