Read the post in:
 繁體中文
繁體中文
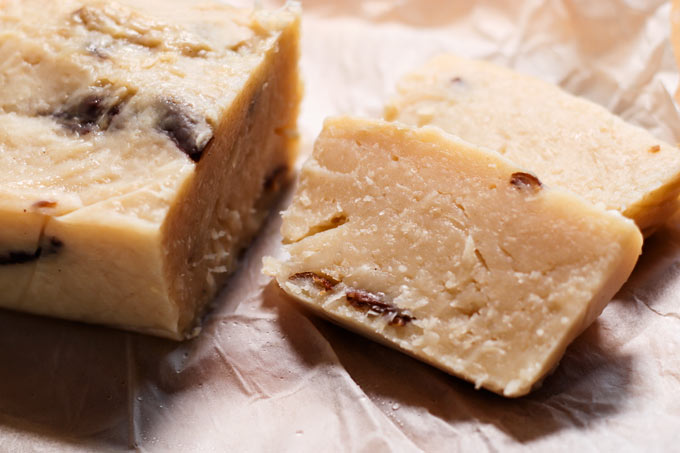
Without any meat or animal products, this meatless Vegan Chinese Turnip Cake (Lo Bak Go) is delicious with just 7 simple ingredients.
Vegan Chinese Turnip Cake
Chinese Turnip cake is on of my favorite traditional Taiwanese dish. It’s a well-known Dim Sum. But actually, we, people grow up in Taiwan, usually eat these Chinese turnip cake in the morning as breakfast, for real.
I remember that I used to eat Chinese turnip cake as breakfast when I was in elemtory school. But things have changes, definitely. Now I’m more of a yogurt and overnight oats person. Yet I still love Chinese turnip cake.
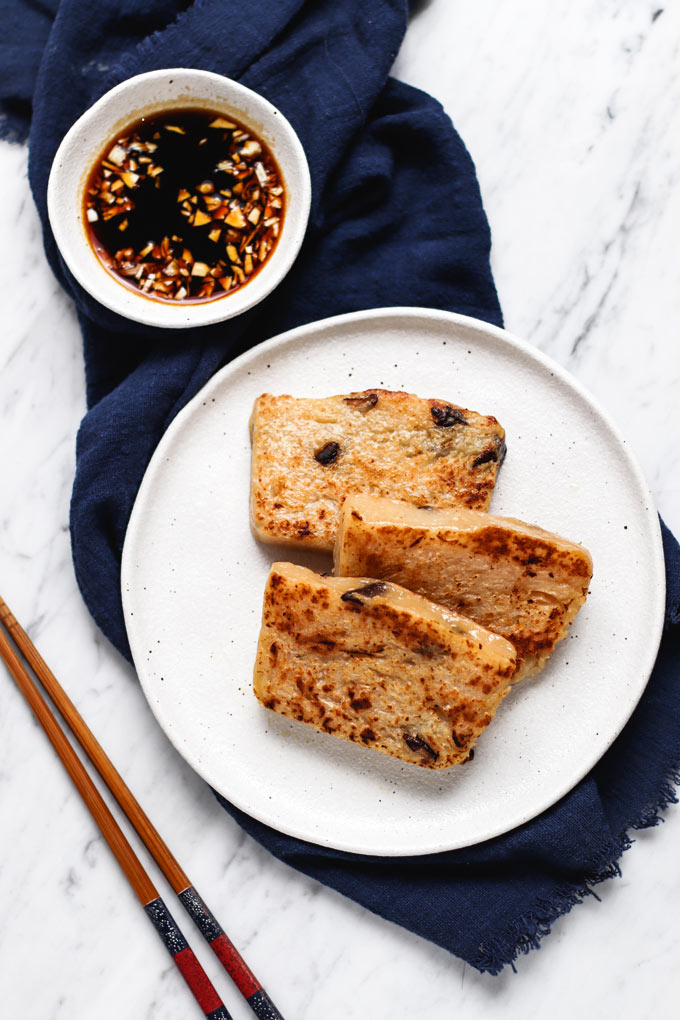
Common Chinese turnip cake usually has meat in it, which is for sure not going to happen. And I also think it’s not necessary because the base ingredient in Chinese turnip cake is turnip (but we usually use daikon because it’s more common). And the most important thing to give it flavor is shallot and gounrd white pepper.
It’s also quite simple to make. You only need 7 basic ingredients to make them. The ingredients are also really common and easy to get, at least I can get all of them in the nearby store from my house.

I’m didn’t add much salt to this Chinese turnip cake because I usually enjoy them with thick sweet-savory soy sauce.

You can make them ahead of time and store them in the fridge. They can stay there for about 3-5 days. When you feel like some Chinese turnip cakes, just pan-fry them on both sides with a little bit of oil until they’re a little bit brown. A simple, delicious dish, or dim sum?
How to Make Vegan Turnip Cake:
- Grate the Chinese turnip (daikon) into thin slices. Save the water released from the radish.
- In a mixing bowl, add the rice flour, ground white pepper, and salt. Mix together.
- Add in the soaking mushroom water, vegetable stock, and radish juice. Mix to combine.
- Place a frying pan over medium heat. Once the pan is hot, add oil, minced shallot, and sliced shiitake mushrooms. Stir and cook for 1 minute. Then add the grated radish. Continue to cook for another 1-2 minutes until the radishes are soft.
- Add the rice flour mixture. Stir to combine. Cook and stir until the mixture thickens up. If your mixture seems too dry, add more vegetable stock or water to help bring them together. Once the mixture is pretty thick, turn off the heat.
- Grab a heatable container or a baking loaf pan. Line it with steaming cloth or parchment paper. Transfer the mixture into the pan and press it down.
- Place another steaming cloth on top of the container to absorb the water vapor. Steam it for 30-40 minutes.
- After the steaming process, remove it from the heat. Let it cool to room temperature and then refrigerate for 2-3 hours to set.
- Take out from the fridge and remove it from the container. Slice the cake into thick slices.
- Heat a frying pan over medium heat. Once the pan is hot, add a thin layer of oil to the pan. Place the turnip cakes in. Pan-fry the first side for 2-3 minutes first, then flip to cook on the other side for 1 minutes until sides are crisp and brown. Serve with soy sauce with some minced garlic or chili sauce if you like.

You can also add minced garlic or chili oil to the soy sauce to add more flavors.
If you’re interested in more Asian recipes, check out my Vegetable Korean Pancakes, Vegan Bibimbap, and Steamed Stinky Tofu.
I hope you enjoy it as much as I do. If you make this recipe, don’t forget to tag @Barrelleaf + #barrelleaf on Instagram. I always love to see them and to know how it goes.
素蘿蔔糕 Vegan Chinese Turnip Cake (Lo Bak Go)
食材
- 3-5 dried shiitake mushrooms 乾香菇, soaked in 60 ml water for 15 minutes. Squeeze out the water and sliced. Save the water 浸泡後切絲,留下香菇水
- ½-1 Tbsp oil 油
- 3 shallots 紅蔥頭, minced 切末
- 425-480 g Chinese turnip/daikon radish 白蘿蔔, net weight 淨重 (~15oz)
- 120 g long-grain rice flour 在來米粉
- 200 ml (½+⅓ cup) vegetable stock 蔬菜高湯, or water, add more if needed 或水,視情況 增加
- ¼ tsp ground white pepper 白胡椒粉
- ½ tsp salt 鹽
作法
- Grate the Chinese turnip (daikon) into thin slices. Save the water released from the radish. You can also use a food processor with a slicing plate.
- In a mixing bowl, add the rice flour, ground white pepper, and salt. Mix together.
- Add in the soaking mushroom water, vegetable stock, and radish juice. Mix to combine.
- Place a frying pan over medium heat. Once the pan is hot, add oil, minced shallot, and sliced shiitake mushrooms. Stir and cook for 1 minute. Then add the grated radish. Continue to cook for another 1-2 minutes until the radishes are soft.
- Add the rice flour mixture. Stir to combine. Cook and stir until the mixture thickens up. If your mixture seems too dry, add more vegetable stock or water to help bring them together. Once the mixture is pretty thick, turn off the heat.
- Grab a heatable container or baking pan. Line it with steaming cloth or parchment paper. Transfer the mixture into the pan and press it down.
- Place another steaming cloth on top of the container to absorb the water vapor. Steam it for 30-40 minutes.
- After the steaming process, remove it from the heat. Let it cool to room temperature and then refrigerate for 2-3 hours to set.
- Take out from the fridge and remove it from the container. Slice the cake into thick slices.
- Heat a frying pan over medium heat. Once the pan is hot, add a thin layer of oil to the pan. Place the turnip cakes in. Pan-fry the first side for 2-3 minutes first, then flip to cook on the other side for 1 minute until sides are crisp and brown. Serve with soy sauce with some minced garlic or chili sauce if you like.
中文版
- 將蘿蔔刨成絲,連蘿蔔水一起留下
- 取一個攪拌碗,放入在來米粉、胡椒粉、鹽,稍微拌和
- 倒入香菇水、蔬菜高湯(或水)與蘿蔔水,混合均勻
- 取一炒鍋,以中火熱鍋,鍋熱後放入油、紅蔥頭末、香菇絲炒香,之後放入蘿蔔絲一起拌炒至蘿蔔軟化
- 將先前調好的在來米粉漿加入,攪拌均勻,使其糊化,視情況添加高湯或水,煮至整體偏濃稠不流動,熄火
- 取一可蒸容器,裡頭鋪蒸布或是烘焙紙,將蘿蔔糕糊填入容器中
- 容器或鍋蓋上綁一塊蒸布,吸附水蒸氣,用電鍋(外鍋兩杯水)或是瓦斯爐蒸 30-40 分鐘
- 蒸好後,取出放涼,再放入冰箱冷藏 2-3小時,之後再取出切塊
- 要吃時再油煎;鍋內放一層薄薄的油,將蘿蔔糕片放下去煎至兩面金黃,搭配醬油膏享用,視個人喜好可再加蒜末或辣椒醬
Video
備註
- Storage: Store in an air-tight container in the fridge for 3-5 days.
- 保存:冷藏密封保存 3-5 天


