烘焙日期:2015/05/05 (二)
最近開始烘焙人蔘,從簡單的餅乾開始。前陣子又敗了塔模,就是為了自己做塔。之前照網路上的食譜做~但可能是因為比例沒抓好、或是過程中不小心揉過頭,麵團出筋,口感沒有達到理想。這次是看了這個影音食譜~自己算比例,終於做出讓自己都驚豔的塔皮,因為葉子真的很愛這一次做出的塔皮~所以覺得一定要記錄下來分享,才有這篇 基本塔皮!
I start my baking journey recently. Start from baking cookies. A few days ago, I bought some tart mold because I really wanna bake tarts for myself. I’ve made some tart based on some recipes that I found online, but they didn’t turn out very well.
This time, I watch this video on YouTube, write my own recipe based on the ratio it provides, and the result is amazingly great! And I think this is the time that I write this recipe down.
因為葉子也有學一點法文,所以時候也會稍微查一下法文食譜,而這次為了做基本塔皮~ 稍微查了一下,才發現法文的塔皮有分三種:Pâte brisée、Pâte Sucrée, Pâte Sablée 點連結可以去看一下英文解釋~葉子看過後覺得這次做的是比較像Pâte brisée,口感較酥脆。
食材的比例是聽參考影片中提到的比例 (麵粉、奶油、水:3:2:1) 的比例來製作。然後因為葉子之前做失敗滿多次的,所以之後試作都不敢做太多,這次的麵團就是迷你可愛版。差不多剛剛好就是一個4吋(約11公分)的派,不過葉子這次是用12公分,餅皮就比較薄一些。
I’ve learn a little French, so I google some French tart recipes as references. I learn that there are basically 3 kinds in tart catogory:Pâte brisée、Pâte Sucrée, Pâte Sablée. You can click the link to see the explanation on each type. I think this recipe belongs to Pâte brisée.
The ratio, as the video mentions, is 3:2:1 as flour, butter, water. Because I’ve fail many times before, so I use very little amount as a test. It’s about 4″ / 11 cm pie crust. I use 12 cm mold so the pastry is a little bit thin.
(※ 引用食譜煩請註明出處與原文網址.勿拿此食譜行商業行為 ※)
基本塔皮(派皮) (無蛋、中筋麵粉版)
Basic Pie Crust / Pâte brisée (No Egg)
 食材 Ingredients (一個4.5吋派模 for one 11cm/4″):
中筋麵粉 all-purpose flour 30g
無鹽奶油 unsalted butter 20g
冰水 cold water 7-10g
鹽 a pinch of salt 1小撮
*糖 surgar 1/2 tsp
2017.0304 新增 (一個6吋派模 for one 15cm/6″ mold):
中筋麵粉 all-purpose flour 120g
無鹽奶油 unsalted butter 80g
冰水 cold water 30-40g
鹽 a pinch of salt 1小撮
PS.
*糖非必要
*Sugar is optional.
※ 準備工作:
.無鹽奶油切成小丁,放冷凍5分鐘
.麵粉過篩
※ Preparation:
.Cube the butter and leave it in freezer for 5 minutes.
.Sift the flour.
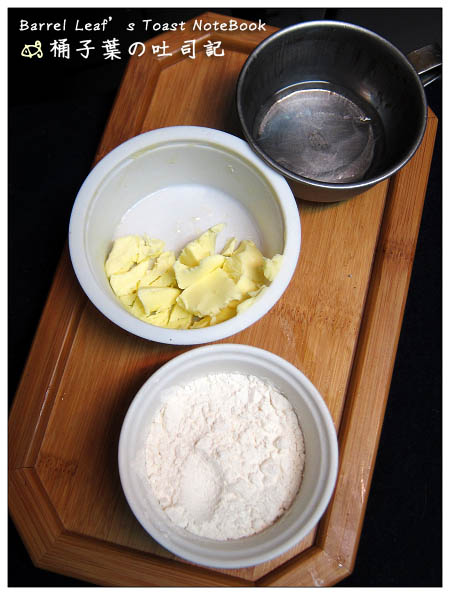
最基本的材料就是麵粉、奶油、水。重要的是食材最好都要是冰的,奶油一定要冰,
融化了口感就不會酥了,水也是要冰的,比較講究的話~麵粉最好也給它冰一陣子。
看了不少食譜~有人用低筋麵粉、也有人用中筋。兩種粉做出的塔皮口感略有差異,
低筋麵粉做出來的塔皮會比較像餅乾~而中筋麵粉做出來是比較酥,可以兩種都做做看,
找出自己喜歡的口感與比例。目前兩種都做過,自己是比較喜歡中筋麵粉做出來的口感~
糖和鹽葉子沒有特別去計算,就像影片一樣~大略加一些,所以就沒有拍進來了。
There are only 3 basic ingredients: flour, butter, and water.
The most important thing is that they should be “very cold,”
especially for the butter.
Because if the butter melts, the ideal crispy, crumbly texture will be gone.
Some people use cake flour to make pâ
;te brisée, others use all-purpose flour.
The final textures of both are slightly different.
The one uses cake flour tastes more like biscuit.
The others tend to be more crumbly.
You can try both and see which works better for you.
I personally like to use all-purpose flour
I do not measure the sugar and salt,
since they are not very important as well as not many in this recipe.
.作法/步驟 Step:
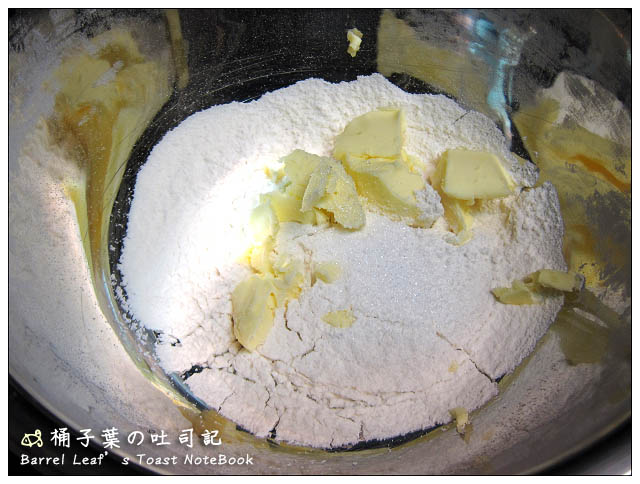
1.將鹽與切丁的奶油塊加入已過篩的麵粉
1.Add salt and cubed butter to the sifted flour.
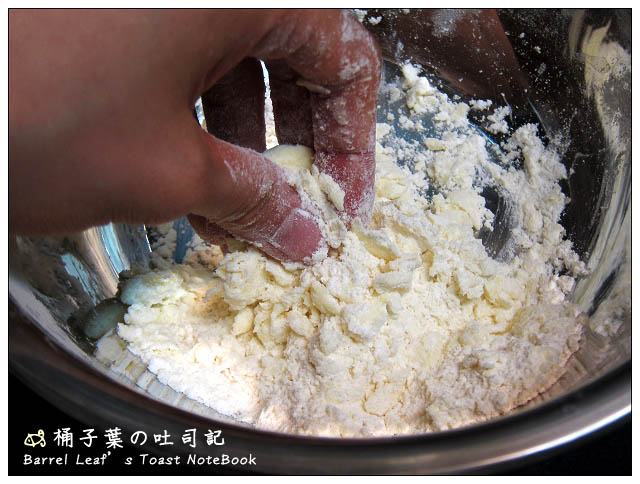
2.用手像是搓沙子的方式,把奶油丁塊搓入麵團,讓麵粉包裹住奶油
(這一個步驟也有人是用刮刀或刮板做,葉子是比較喜歡用手,但如果是手比較熱的人,最好是用工具替代手,不然手太熱,容易在搓的過程中把奶油融化,這樣做出來的口感就不易酥)
2.Mix the butter into the flour by rubbing.
Some people use a spatula, but I prefer using my hands. But if your hands’ temperature is too high, I’ll recomend using a spatula or other tools.
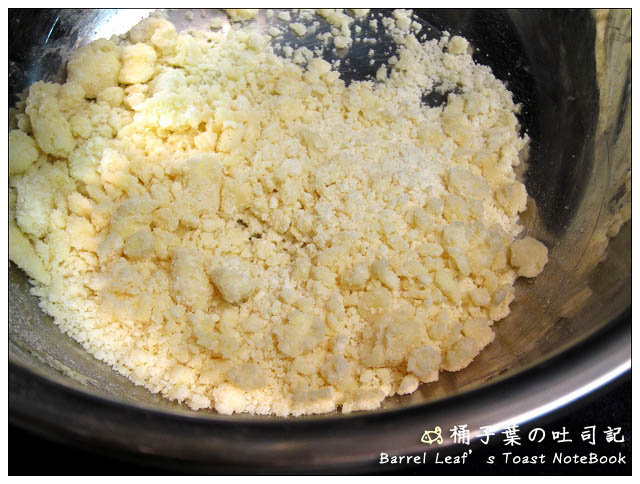
這步驟會稍微花一點時間,搓到大略變成像這樣,有點像餅乾屑屑的模樣就可以了。
This step will take some times. Work until it becomes a sand-like texture.
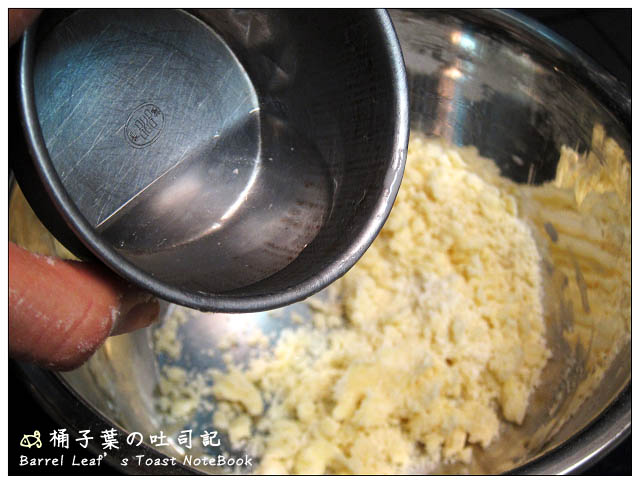
3.加入冰水,邊加入邊拌用筷子或是用手指拌,可成團即可停止加水
冰水的份量會打7-10g,是因為會依麵粉的吸水性不一樣而改變,通常是不會用到全部,可以成團就可以了,像葉子這次就沒有用到10g的水,
3.Add cold water. Just enough to make it into a dough. Due to the different absorbance in difference flour, the needed amount of water will differ.
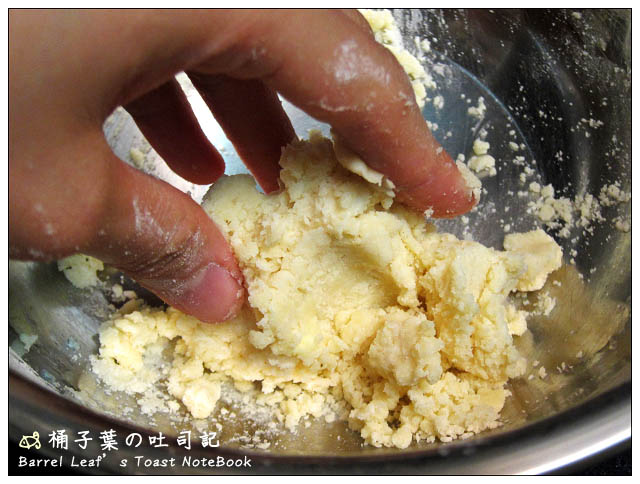
像這樣稍微可以捏成團就可以停止加水摟~
When it looks like this, it means that the water is enough.
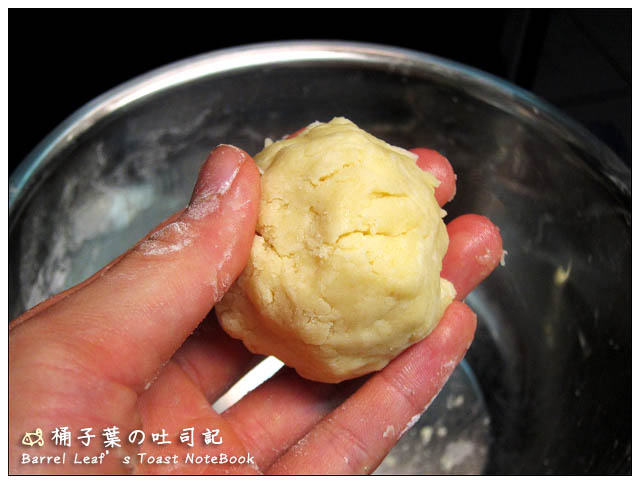
4.接著用手掌以同方向按壓的方式壓成團,盡量不要去揉,以免出筋影響口感
4.Then use your palm to press the flour together into a dough. Do your best not to knead them because we don’t want it to develop gluten.
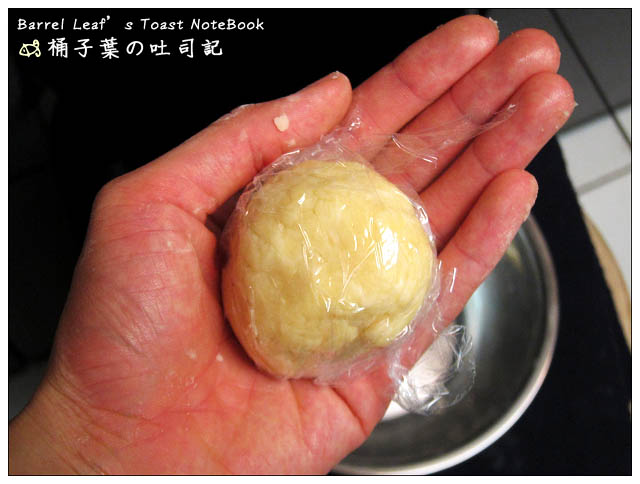
5.捏成團後,用保鮮膜包起來,放置冰箱冷藏至少30分鐘
5.After it becomes a dough, wrap with plastic and refrigerate at least 30 minutes.
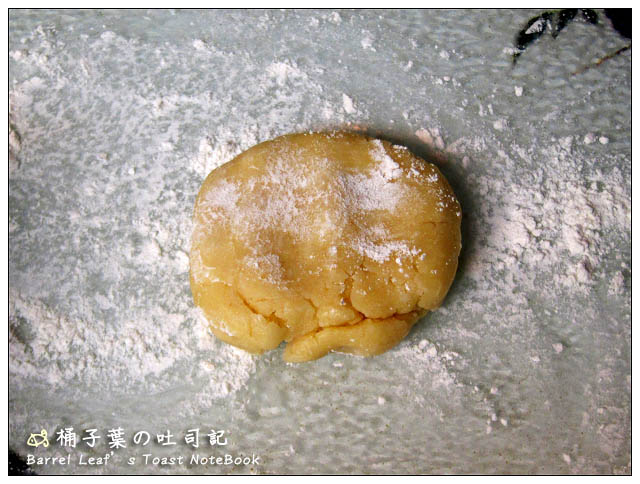
6.冰過一陣子後,再將麵團拿出來,稍微回溫一下。桌上灑些麵粉,移出麵團,上頭也灑些麵粉防沾黏
(我的手粉是用高筋麵粉,基本上使用的手粉種類應該沒有太大的影響,主要是防沾黏)
6.After refrigerate, take the dough out for 2-4. Slightly flour the work surface and the dough.
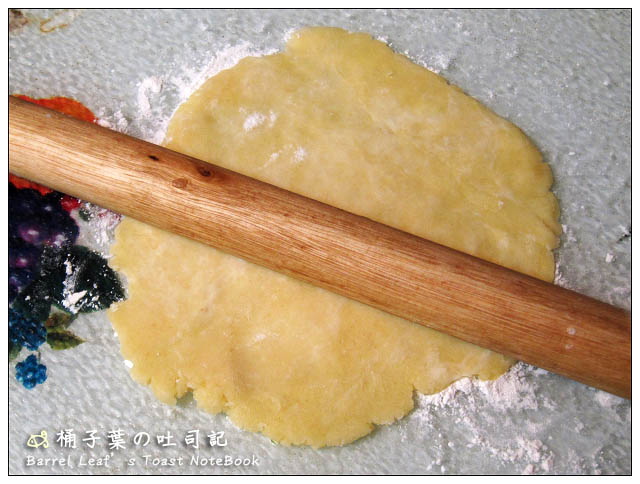
7.用桿麵棍將麵皮均勻桿成大圓餅貌,桿成比塔模稍大、約0.5公分厚的扁圓型,再移至塔模上,用手指將麵團貼於塔模,割掉多餘的麵皮
7.Roll the dough into an evenly flatter circle about 0.5 cm thick. Move the pastry onto the tart and press it to the mold with your fingers. Remove the extra pastry.
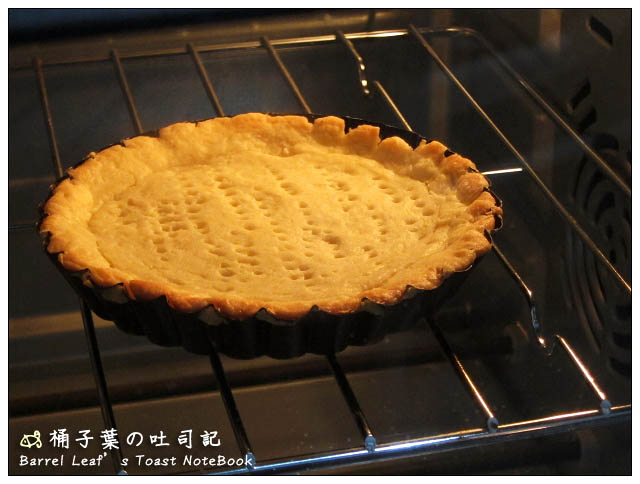
8.用叉子在麵皮上戳洞(防止麵皮在烤的時候膨起)
9.塔上放一層烘焙紙,上頭放重石/米/豆子,放入已預熱好的烤箱,以180℃烤約15分鐘(這時塔皮是半熟狀態),
若要再填餡一起烤,就烤半熟即可。
若要烤全熟,之後移開烘焙紙與壓物,再烤至上色(約7~10分鐘)即可(全熟)
8.Poke holes on the pastry with a fork. 9.Place some baking papers and baking stones (or beans like I do) on the tart.
Blind bake at 180℃ for about 15 minutes. (The tart is half-cooked at this moment.) If you are making quiches or other tarts whose filling will have to bake, then you can stop at this step to make the filling.
Remove the baking papers and stones/beans. Continue to bake for 7~10 minutes until golden brown. (completely cooked)
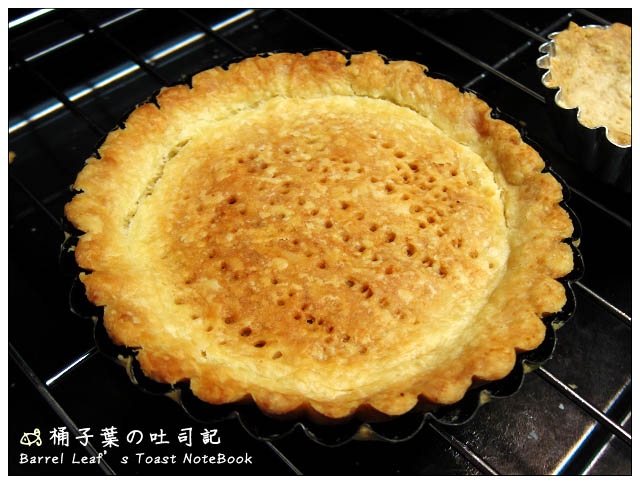
將將將將~出爐摟~! 烤的時候就聞到奶油與麵粉結合的香氣。因為我喜歡顏色稍微深一些的塔皮,所以最後的上色步驟有將上火溫度提高至190℃。
Then, it’s done! The heavenly fragrance of butter comes out from the oven when it’s almost done. I like my tart crust to be darker, so I increase the temperature to 190℃ for the last few minutes.
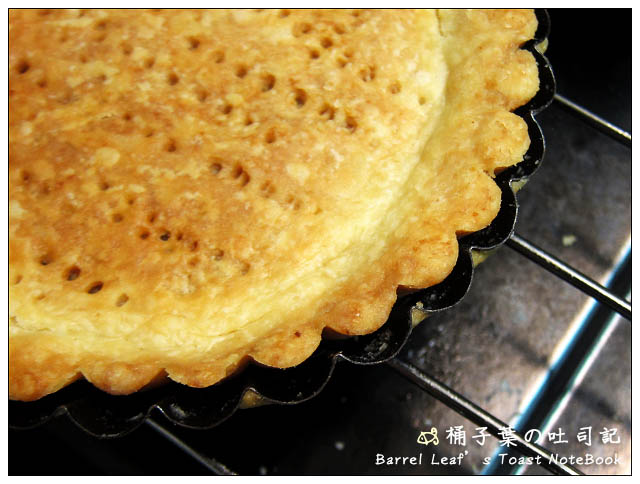
這次沒有什麼揉,但是麵團還是有縮。不知道到底是哪個環結影響到” 在想可能是鬆馳不夠久。
I do my best to not knead the dough, but the crust still withdraws a little from the sides. I think maybe I do not let the dough rest long enough.
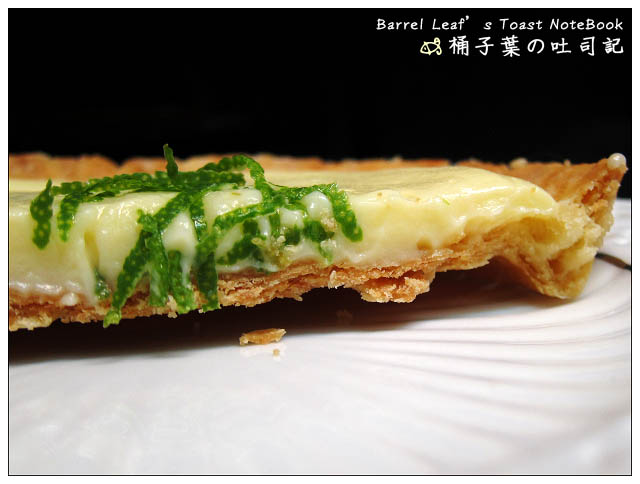
不過這次做出來的塔皮口感真的很棒~!很有層次,真的讓葉子覺得勝過之前吃過很多的塔皮!
之後搭配檸檬卡士達餡~做出了 檸檬卡士達塔,好吃的塔皮讓葉子自己都忍不住一口接一口~:9
Even though it shrinks a little bit, but the crumbly, crispy texture is aawesome!
I make some lemon custard as the filling. It tastes really, really, wait for it, really good!
— 2017.03.04 新增 實作影片 —
https://www.youtube.com/watch?v=NmKwn1yllOw
延伸閱讀:
【食譜】基本塔皮(派皮) (無蛋、中筋麵粉版) 詳細圖文步驟 五樣基本材料 自製酥脆塔皮
【食譜】檸檬卡士達塔 (蛋黃牛奶檸檬塔) Lemon Custard Tart — 微酸乳甜~減糖不失美味
【食譜】自製香草卡士達 Homemade Custard — 濃郁乳香甜~減糖美味不減 第一次做就成功!
【食譜】鮮奶蛋白燉奶 Steamed Milk Pudding — 免烤箱簡易點心~ 適合全家人的點心
【食譜】爆漿熔岩巧克力蛋糕 (半熟版) Fondant au Chocolat — 超簡單療癒系甜點
【桶子葉の吐司記 Barrel Leaf’s Toast NoteBook】
[Facebook.IG.YouTube.Profile.Website]
